

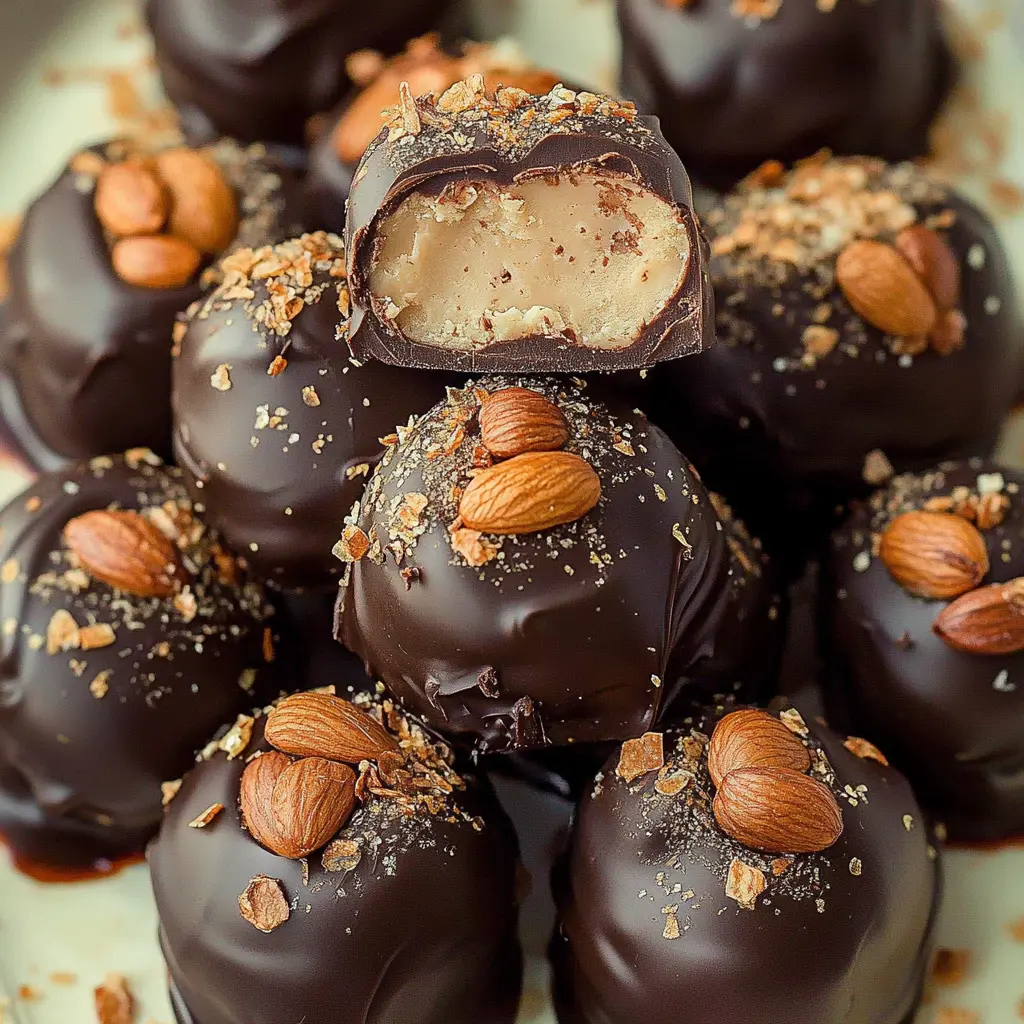
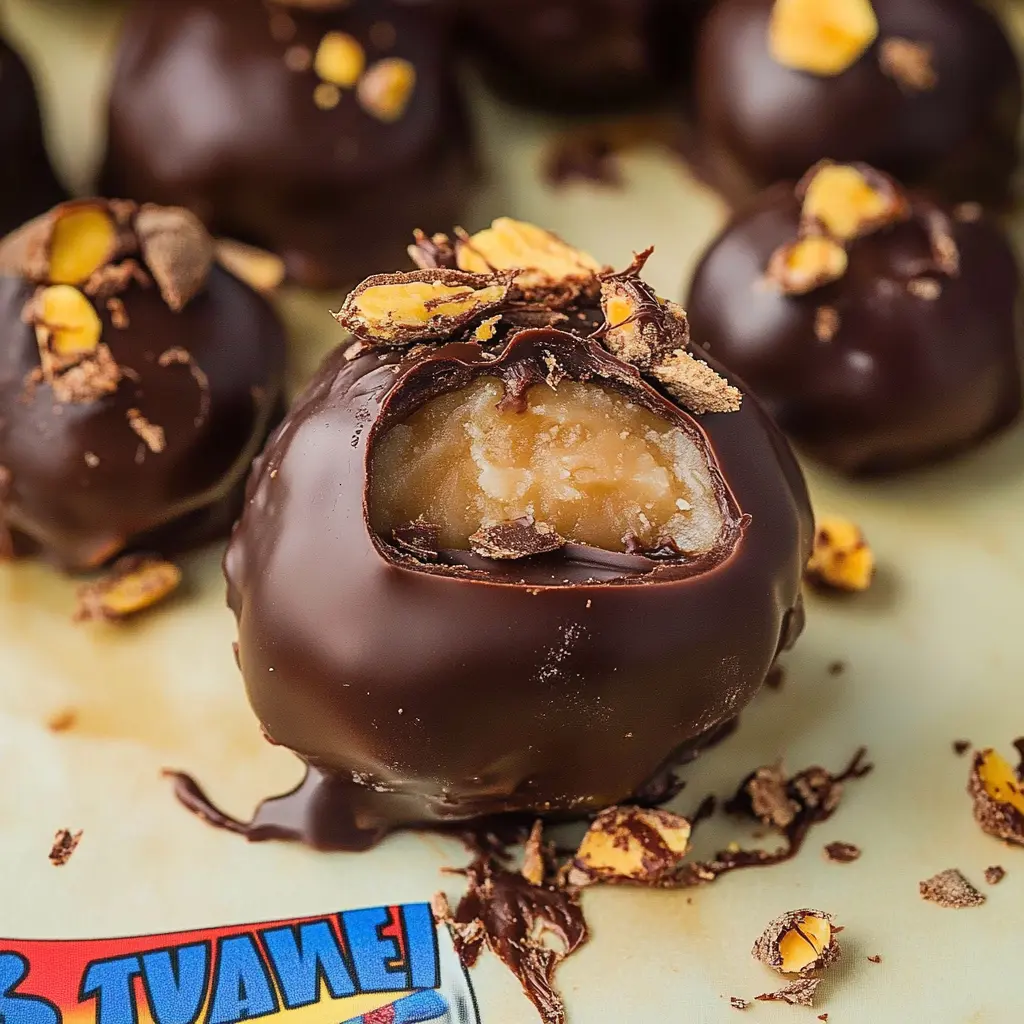
When it comes to indulgent, crowd-pleasing desserts, Butterfinger Balls are a treat that never disappoints. These bite-sized morsels combine the rich, nutty flavor of peanut butter with the irresistible crunch of Butterfinger candy bars, all coated in a smooth layer of chocolate. Whether you are having a party, celebrating a holiday, or just want a treat, these peanut butter balls will fill the void.
That’s what makes the appeal of Butterfinger Balls perfect. They create a sweet and crunchy mix of Butterfinger-coating, through which fluffy peanut butter screams. A chocolate coating gives it a more luxurious finish. They’re easy to make, require no baking, and are incredibly versatile—add a sprinkle of sea salt or extra candy bits for a fun twist!
This recipe is a fun and delicious way to bring a favorite candy bar into a new form, making it perfect for anyone with a sweet tooth. And because they’re simple to prepare, they can be whipped up quickly, leaving you with more time to enjoy the compliments you’ll surely receive from friends and family.
Now, let’s dive into the essential ingredients you’ll need to make these irresistible treats!
If you’re a fan of no-bake desserts, you might also want to check out this creamy lasagna soup that’s as comforting as it is delicious, or these ultimate protein cookies, a perfect snack for all sweet lovers!
Why You Need These Butterfinger Balls in Your Life
Let’s be honest—who doesn’t love a Butterfinger? If you’re like me, the minute you unwrap that yellow bar, you’re hooked. The crunchy, peanut buttery center combined with that delicious chocolate coating? Absolute perfection. But what if I told you there’s an easier way to enjoy that same irresistible flavor, without having to unwrap a whole bunch of candy bars? That’s where these Butterfinger Balls come in.
Imagine creamy peanut butter, crushed-up Butterfingers, and a touch of sweetness, all rolled up into bite-sized balls. It’s like a mini celebration in your mouth. Seriously, if you’re looking for a quick, crowd-pleasing snack that everyone will love, this is it.
What You’ll Need for Butterfinger Balls
This recipe is super easy and you don’t need a ton of ingredients. You probably already have a few of them lying around. Here’s what you’ll need:
- 1 package of Butterfingers (about 6-8 bars)
- 1 cup of peanut butter (the creamy kind works best!)
- 1/4 cup of powdered sugar (this gives it a nice sweetness without being too overpowering)
- 1 1/2 cups of graham cracker crumbs (for a little crunch and texture)
- 1 bag of milk chocolate chips (or you can use dark chocolate if you’re feeling fancy)
- 1-2 tablespoons of butter (for melting the chocolate)
How To Make Butterfinger Balls
Let’s talk about how simple and fun this is. You won’t believe how easy it is to get these Butterfinger Balls from the mixing bowl to your mouth (like, super quick).
Crush the Butterfingers
Start by unwrapping your Butterfingers (don’t eat them yet, trust me). Place them in a Ziploc bag and crush them up with a rolling pin or mallet. You want some big chunks and some fine crumbs. That crunch will add so much texture to the balls. Honestly, I could snack on just the crushed-up Butterfingers, but let’s stay focused!
Mix the Ingredients
In a large bowl, combine the crushed Butterfingers, peanut butter, powdered sugar, and graham cracker crumbs. Mix everything together with a spatula or your hands (yes, it’s messy, but it’s fun). The mixture should come together into a sticky, slightly crumbly dough.
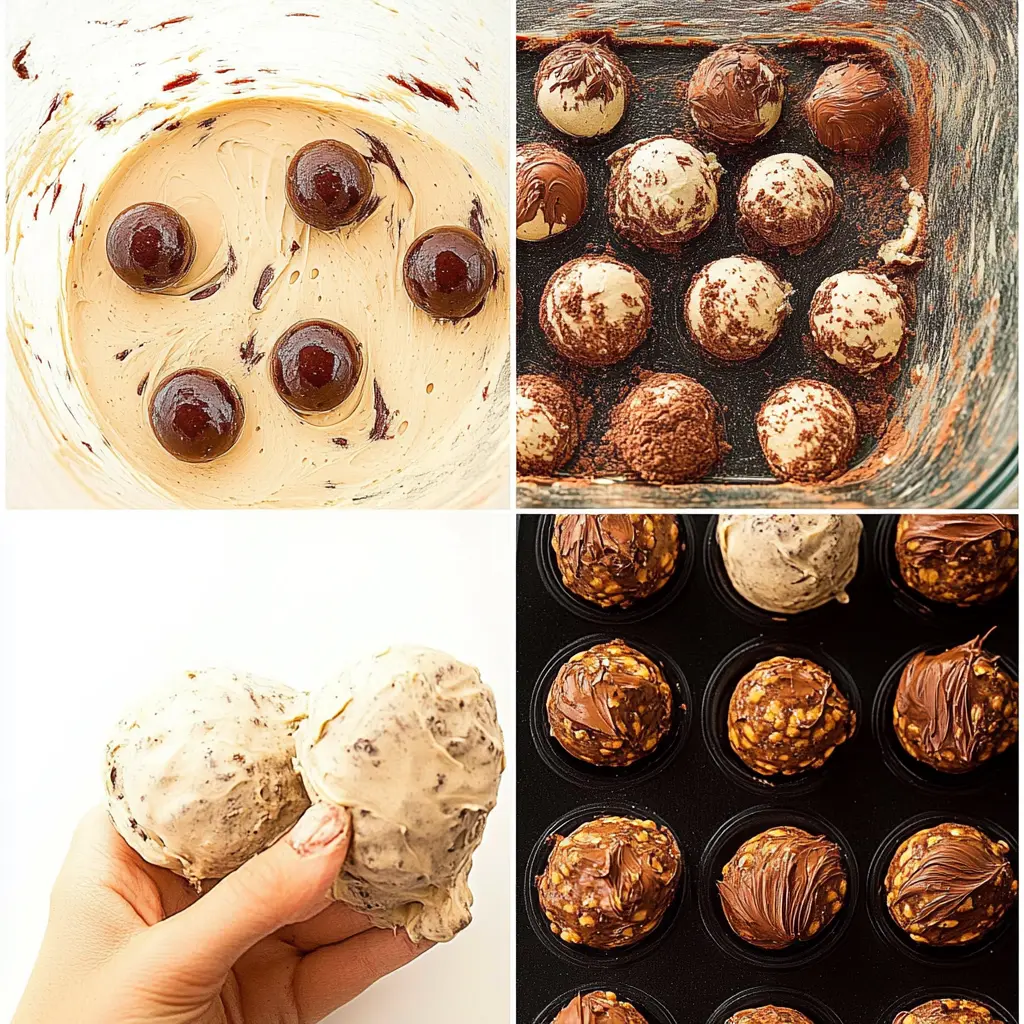
Roll Into Balls
Now comes the fun part—rolling the mixture into balls! Grab a tablespoon of the mixture and roll it into a ball between your hands. Place the balls on a parchment-lined baking sheet. Pro tip: Don’t stress about them being perfect; they’re going to taste amazing no matter what.
Chill for a Bit
Pop the balls in the fridge for about 30 minutes. This helps them firm up and makes the chocolate coating stick better when you dip them. Trust me, you want that cold, firm texture when you bite into them.
Melt the Chocolate
While your balls are chilling, melt the milk chocolate (or dark chocolate, if that’s your thing) with the butter. You can do this in a microwave-safe bowl in 20-30 second intervals, stirring in between. Make sure the chocolate’s smooth and ready to coat your Butterfinger balls.
Dip and Coat
Once the balls have chilled, it’s time for the fun part—dipping them in that silky chocolate. Use a fork to dip each ball into the melted chocolate, letting the excess drip off before placing it back on the parchment paper. If you’re feeling extra (and I know you are), sprinkle some crushed-up Butterfinger bits on top for an added crunch!
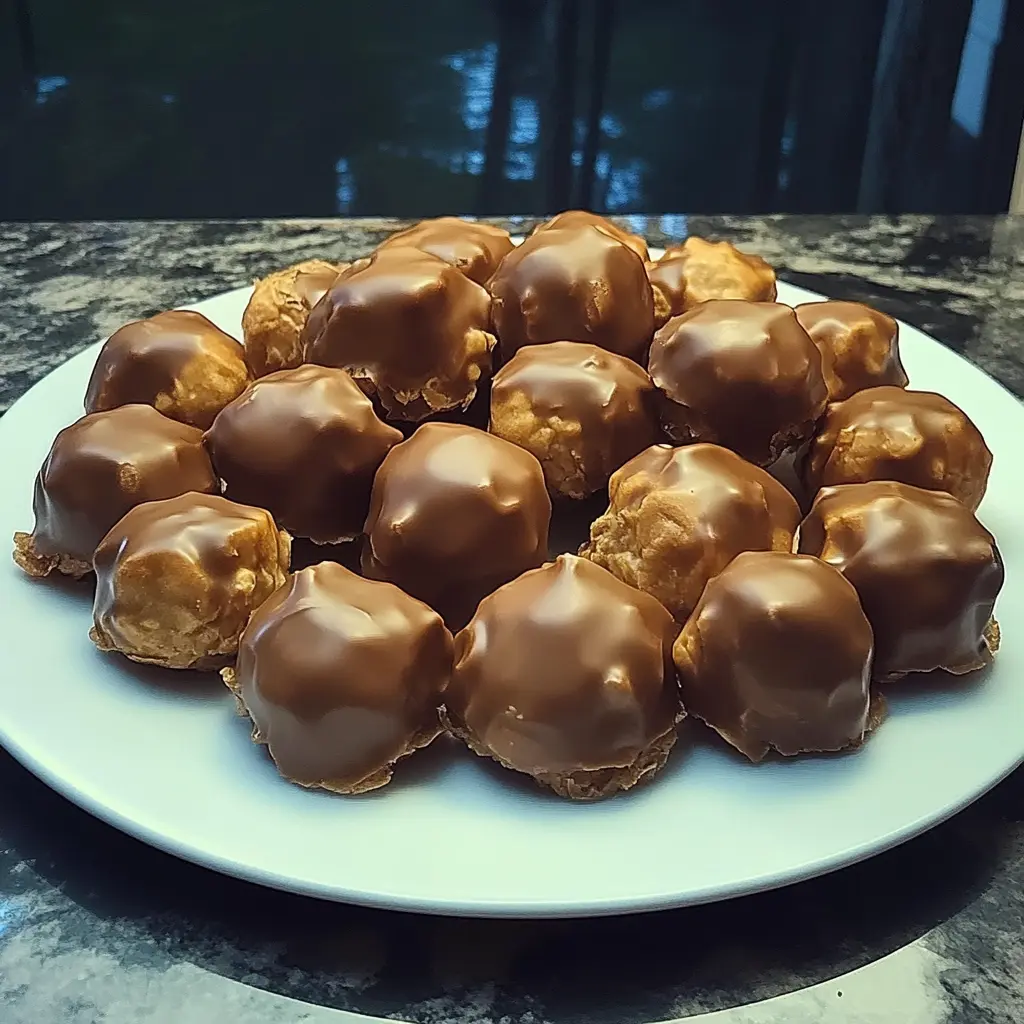
Let It Set
Allow the chocolate coating to firm up, either by leaving them at room temperature or chilling them in the fridge. I know it’s tough to wait, but it’s so worth it.
Now, you’ve got yourself some irresistible little Butterfinger Balls of Heaven! Enjoy every bite!
Why You’ll Love These Butterfinger Balls
They are really going to be your new favorite snack. Let’s start at the beginning. It’s simple: you don’t even really have to have anything in the way of ingredients. You don’t have to bake anything. Super flexible, take to parties, have at movie night, or whip up a batch just because you feel like having a snack. And honestly? Total crowd pleaser. Family get-togethers, potlucks, or just for yourself-there’s really no shame in that-these Butterfinger Balls will disappear before you know it.
Tips for Perfect Butterfinger Balls
- Make Ahead: You can totally prep these the day before and keep them in the fridge. They’ll stay fresh for up to a week—if they last that long.
- Switch Up the Coating: Not a fan of milk chocolate? Try white chocolate for a fun twist, or even drizzle them with caramel for a decadent touch.
- Go Mini: Want to make them bite-sized? Use a teaspoon to roll smaller balls. They’ll be great for parties or gift-giving!
Conclusion:
To finish it off, Butterfinger Balls are those easy no-bake treats that everyone loves because of the creamy peanut butter flavor, the smooth chocolate on the outside, and the crunchy Butterfingers inside. They make the perfect gift for friends and family, be it on a special occasion, during the holidays, or just to munch on for something simple and sweet, for any event. These candy balls are sure to impress friends and family alike. It takes just a couple of simple ingredients and some time spent chilling, and voila! You’ve whipped up a batch of sweet delights that are simply perfect and mouthwatering.
The best part about butterfinger balls is that they are thoroughly customizable. You can add more candy bits, try different tastes of chocolates or even use any nut butters; the possibilities are endless. So, next time a sweet tooth hits you, try out this recipe. We promise they won’t last long!
Enjoy making and sharing your Butterfinger Balls and experimenting with flavors on making them truly your own!
FAQs About Butterfinger Balls
Can I make Butterfinger Balls ahead of time?
Yes, Butterfinger Balls are perfect for making ahead! You can prepare them up to a week in advance and store them in an airtight container in the fridge. If you’re planning to serve them later, just let them sit at room temperature for a few minutes before serving to allow the chocolate coating to soften slightly.
How long do Butterfinger Balls last in the fridge?
When stored in an airtight container, Butterfinger Balls will stay fresh for up to two weeks in the refrigerator. They’ll retain their texture and flavor for quite some time, so you can enjoy them throughout the week.
Can I freeze Butterfinger Balls?
Absolutely! To freeze them, place the chocolate-covered balls on a baking sheet and freeze them until firm. Then transfer them to an airtight container or freezer bag. Frozen Butterfinger Balls will last for up to three months. When you’re ready to enjoy them, simply thaw them for 10-15 minutes before eating.
What if I don’t have graham cracker crumbs?
No worries! If you don’t have graham cracker crumbs, you can substitute with vanilla wafer crumbs or even digestive biscuits. These alternatives will still provide that essential crunch and mild sweetness to complement the peanut butter and Butterfinger.
What’s the best chocolate to use for coating?
While semi-sweet chocolate is the most common choice, you can use any type of chocolate you prefer. Milk chocolate offers a sweeter option, while dark chocolate provides a richer, less sweet taste. Just make sure to melt it carefully and add a bit of oil for smoothness.